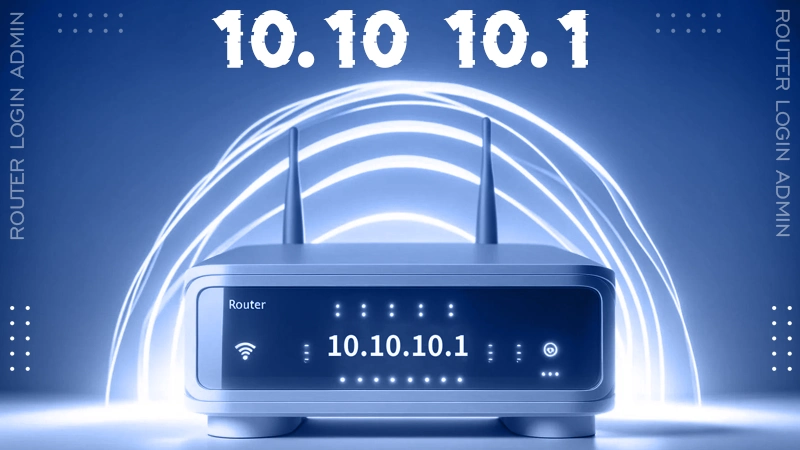
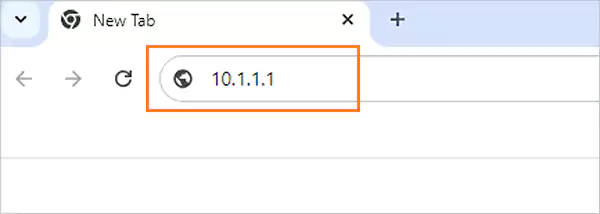
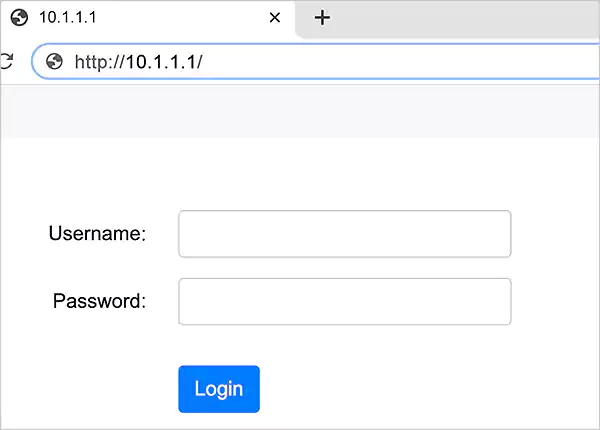
To log in to 10.1.1.1, open your web browser and enter 10.1.1.1, which will take you to the admin portal. Then, enter the username and password, and you are done.
Table of Contents
Table of Contents
Have you ever heard of the default gateway IP, 10.1.1.1? If not, it’s alright because people don’t usually know their IP until they are required to make some changes to the network.
Similar to 192.168.1.1, 192.168.0.1, and 192.168.2.1, 10.1.1.1 is used to access DSL routers, VoIP gateways, and other settings on the local networks and, thus, is called the default gateway IPs.
So, if you are also looking to change your Wi-Fi network name or password, set up parental controls, or change the modem settings, read this blog to the end and learn the 10.1.1.1 admin login process in detail along with the troubleshooting tips. So, let’s jump in!
Quick Answer:
10.1.1.1 is a private IP address that allows users to access the router’s admin panel and make changes to the network settings. To log in to the IP address, type 10.1.1.1 and enter the username and password.
What is 10.1.1.1 Network? – Brief Overview
10.1.1.1 is a private IP address that belongs to IPv4 networks and is commonly used in local area networks. In local administration, you can use this address to access the router’s admin panel and make changes to the network settings and security protocols.
Various home broadband routers, like D-Link, Xfinity Comcast, LPB Piso WiFi, and Belkin, have 10.1.1.1 as the default IP address, which can be accessed using the company’s official admin page.
However, people often misspell it and add two consecutive dots or misplace the three 1s followed by dots, which usually results in an invalid page. Thus, when logging in to the admin portal, you must remember the punctuation with the right placement (10.1.1.1).
How to Find Your Router’s IP Address?
To log in to 10.1.1.1, first, you must verify whether your network uses it as the standard gateway IP. For that, follow the steps below.
- On Windows: Open the Command Prompt and enter ipconfig, or navigate to Settings and check the internet connection properties.
- On Mac: Head to System Preferences >> Network >> Wi-Fi >> Details.
- On Mobile: Navigate to Settings >> Wi-Fi >> Advanced Settings.
How to Log in to 10.1.1.1?
Before you log in to the portal, you must check whether your device is connected to the IP address and whether there’s no other device connected to it. After ensuring that, follow the steps listed below!
- Open the web browser on your device and type 10.1.1.1 in the search bar. Then press enter.
- Now, you will be redirected to the login page for the admin panel.
- Then, enter the username and password in the empty fields.
- Once logged in, you will be redirected to the router’s management page, where you can configure various network settings, such as network name, VPN settings, DHCP settings, password, etc.
Default Username and Password for 10.1.1.1 Admin Login
If you are unable to locate the credentials for the 10.1.1.1 login, you can use the default username and password combinations listed below, so let’s take a look!
| Username | Password |
| admin | – |
| admin | admin |
| admin | password |
| admin | 1234 |
| – | admin |
Let’s look at some common brands and their default usernames and passwords:
| Brand | Username | Password |
| iiNet | admin | admin |
| Optus | admin | password |
| D-Link | admin | admin |
| Belkin | admin | admin |
| LPB Piso Wifi | admin | Password, admin, or 1234 |
How to Reset Your Password?
If you have forgotten the router’s username or password and can’t connect even using the default username and password, you might have to factory reset your router.
However, the thing to note is that a factory reset will delete all the custom settings and configurations. Thus, I recommend that users proceed with caution.
Let’s look at how to reset your router:
- Take a sharp object, like a safety pin or a toothpick.
- Now, press the reset button at the back or bottom of the router.
- Press and hold the button for approximately 15-20 seconds until the LED light starts flickering.
- Then, your router will be restored to its factory settings.
However, while you reset your router, you will lose your internet connection. Thus, I recommend you seek the expert’s assistance or get help from someone with sufficient technical knowledge.
Common Problems You Might Face During the 10.1.1.1 Login
While logging in to the IP address, you might encounter issues that will stop you from accessing the admin panel. Here, I’ve listed the most common errors and their possible fixes, so let’s take a look!
Unresponsive Server or Router
If your router or server turns out to be unresponsive, there might be some technical issues.
To fix this, try disconnecting your device, leaving it for a while, and turning it back on. Check for any firmware updates or firewall settings that might be blocking your access to the internet.
If none of the above works, try resetting the router to its factory settings.
Connection Issues
If you tried to connect to the 10.1.1.1 IP address but received an error message instead, it might be because your device on the LAN is not connected to the IP address.
To fix this, you must ensure your router is connected to the computer. The next thing you need to do is check whether any device on the network is using that address.
For that, open the Command Prompt, press Start on Windows, type ping 10.1.1.1, and press enter. If you receive an error or your request times out, it means your device is not using 10.1.1.1.
Misspelled IP Address
As I’ve mentioned, people confuse 10.1.1.1 with 10.0.0.1, 10.01.1.1, or 10.1.10.1, which eventually affects the static IP address assignment and results in an invalid page.
Thus, you must ensure that the IP address you’ve entered is spelled correctly and that no ‘1’ is confused with ‘I’.
IP Address Conflicts
When multiple devices are connected to the same IP address, it causes an IP address conflict. To resolve this, you must ensure that your internet service provider (ISP) has allotted the IP address to only one device per network and that no other device uses it as a static address.
You must also make sure the DHCP server range doesn’t include 10.1.1.1 to avoid unnecessary disruption in network communication.
Wrapping Up!
Learning 10.1.1.1 IP admin login can make it easy to manage network settings and fix minor issues without relying on a technician.
However, you must remember that if you encounter any unfathomable issue, you must refer to the manufacturer’s documentation or seek assistance from your internet service provider.
Frequently Asked Questions
How do I log in to 10.1.1.1?
How to log in to 10.1.1.1 on lpb.wifi/index.php?
To log on to lpb.wifi/index.php using 10.1.1.1, use the common username: ‘admin’ or ‘user’, and the password: ‘1234’, ‘password’, or ‘admin.’
Can I pause the Wi-Fi time on Piso Wi-Fi?
Yes, you can pause time on Piso Wi-Fi by navigating to the 10.1.1.1 gateway and clicking the Pause Time option.

Related Posts